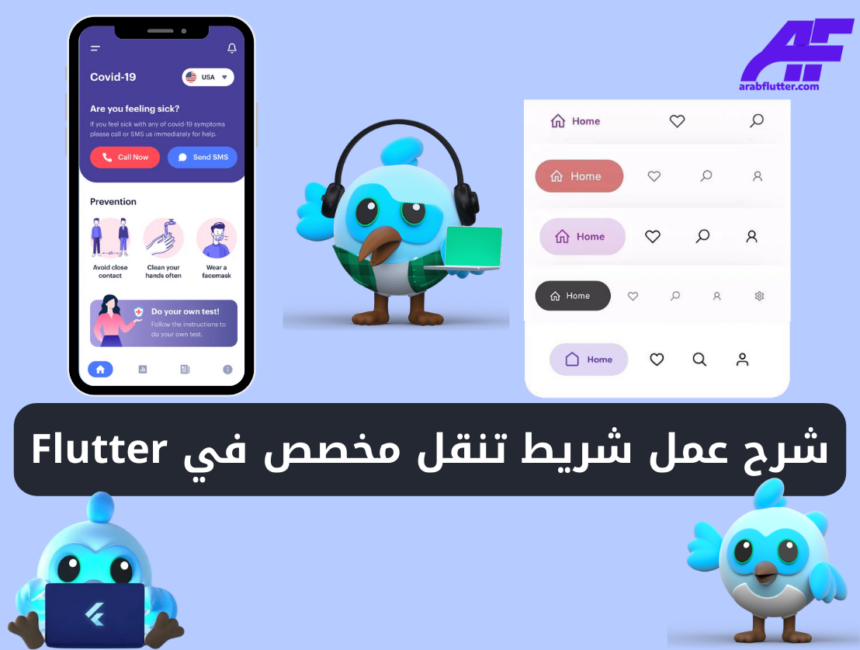
Flutter هو إطار عمل متعدد النظم لتطوير تطبيقات الهواتف المحمولة، والذي يوفر مجموعة غنية من المكونات المدمجة التي تسهل عملية إنشاء التطبيقات. في هذه المقالة، سنتعلم كيفية عمل شريط تنقل مخصص (Custom Navigation Bar) في Flutter.
الخطوة 1: إنشاء كلاس BottomNavBarItem
سنبدأ بإنشاء كلاس BottomNavBarItem والذي سيمثل كل عنصر سيظهر في شريط التنقل. سيحتوي هذا الكلاس على خصائص العنوان والأيقونة الخاصة بكل عنصر.
class BottomNavBarItem {
  final String title;
  final IconData icon;

  BottomNavBarItem({
    required this.title,
    required this.icon,
  });
}
“اقرأ أيضاً: شرح استخدام Image Picker في Flutter“
الخطوة 2: إنشاء كلاس BottomNavBar
سنقوم بإنشاء كلاس BottomNavBar الذي يمتد من StatefulWidget. ستكون مهمة هذا الكلاس هي تزيين شريط التنقل بأكمله ومعالجة العناصر الفرعية والفهرس الحالي ولون الخلفية ودالة onTap التي سيتم تنفيذها عند الضغط على أي عنصر من عناصر Custom Navigation Bar.
class BottomNavBar extends StatefulWidget {
  final List<BottomNavBarItem> children;
  int currentIndex;
  final Color? backgroundColor;
  Function(int)? onTap;

  BottomNavBar({
    Key? key,
    required this.children,
    required this.currentIndex,
    this.backgroundColor,
    required this.onTap,
  });

  @override
  State<BottomNavBar> createState() => _BottomNavBarState();
}
“اقرأ أيضاً: شرح استخدام ويدجت AnimatedBuilder في فلاتر“
الخطوة 3: تصميم شكل Custom Navigation Bar
سنستخدم الكلاس _BottomNavBarState لتحديد الشكل والرسوم المتحركة لشريط التنقل Custom Navigation Bar. سيحتوي هذا الكلاس على عنصر Container يعمل كحاوية لشريط التنقل المخصص، ويتميز بحواف مستديرة ولون خلفية قابل للتخصيص.
class _BottomNavBarState extends State<BottomNavBar> {
  @override
  Widget build(BuildContext context) {
  	return Container(
      decoration: BoxDecoration(
        borderRadius: BorderRadius.circular(16),
        color: widget.backgroundColor ?? Theme.of(context).colorScheme.primary,
      ),
      width: double.infinity,
      margin: const EdgeInsets.only(bottom: 10, left: 5, right: 5),
      height: 56,
      child: Row(
        mainAxisSize: MainAxisSize.min,
        mainAxisAlignment: MainAxisAlignment.spaceEvenly,
        children: List.generate(
          widget.children.length,
          (index) => NavBarItem(
            index: index,
            item: widget.children[index],
            selected: widget.curentIndex == index,
            onTap: () {
              setState(() {
                widget.curentIndex = index;
                widget.onTap!(widget.curentIndex);
              });
            },
          ),
        ),
      ),
    );
  }
}
“اقرأ أيضاً: شرح استخدام ويدجت TooltipTheme في فلاتر“
الخطوة 4: انشاء كلاس NavBarItem الخاص بكل عنصر
كل عنصر تنقل سيتم تجسيده في كلاس NavBarItem. سيتحكم هذا الكلاس أيضًا في الشكل والرسوم المتحركة والتفاعل لكل عنصر.
class NavBarItem extends StatefulWidget {
  final BottomNavBarItem item;
  final int index;
  bool selected;
  final Function onTap;
  final Color? backgroundColor;

  NavBarItem({
    Key? key,
    required this.item,
    this.selected = false,
    required this.onTap,
    this.backgroundColor,
    required this.index,
  });

  @override
  State<NavBarItem> createState() => _NavBarItemState();
}
“اقرأ أيضاً: شرح استخدام SingleChildScrollView في فلاتر“
الخطوة 5: دمج كل العناصر معًا
سنقوم بتنسيق الشكل لكل عنصر تنقل في الكلاس _NavBarItemState. سنستخدم GestureDetector و AnimatedContainer لضمان انتقال سلس وجذاب بصريًا.
class _NavBarItemState extends State<NavBarItem> {
  @override
  Widget build(BuildContext context) {
    return GestureDetector(
      onTap: () {
        widget.onTap();
      },
      child: AnimatedContainer(
        margin: const EdgeInsets.all(8),
        duration: const Duration(milliseconds: 300),
        constraints: BoxConstraints(minWidth: widget.selected ? 100 : 56),
        height: 56,
        decoration: BoxDecoration(
          color: widget.selected
              ? widget.backgroundColor ?? Colors.white
              : Colors.transparent,
          borderRadius: BorderRadius.circular(16),
        ),
        child: Row(
          mainAxisAlignment: MainAxisAlignment.center,
          children: [
            Icon(
              widget.item.icon,
              color: widget.selected ? Theme.of(context).colorScheme.inversePrimary : Colors.black,
            ),
            Offstage(
                offstage: !widget.selected, child: Text(widget.item.title)),
          ],
        ),
      ),
    );
  }
}
“اقرأ أيضاً: شرح استخدام ويدجت TextButton في فلاتر“
مثال كامل على Custom Navigation Bar
هنا الكود كامل لعرض الـ Custom Navigation Bar يمكنك نسخه وتجربته بنفسك:
import 'package:flutter/material.dart';

void main() {
  runApp(const MyApp());
}

class MyApp extends StatefulWidget {
  const MyApp({Key? key}) : super(key: key);

  @override
  State<MyApp> createState() => _MyAppState();
}
class _MyAppState extends State<MyApp> {
  @override
    int index = 0;
  PageController controller = PageController(
    initialPage: 0,
    keepPage: true,
  );

  @override
  Widget build(BuildContext context) {
    return MaterialApp(
      debugShowCheckedModeBanner: false,
      home: Scaffold(
      extendBody: true,
      appBar: AppBar(
        backgroundColor: Theme.of(context).colorScheme.inversePrimary,
        title: const Text("Custom Bottom Navigation Bar"),
      ),
      body: PageView(
        controller: controller,
        onPageChanged: (value) => setState(() => index = value),
        children: <Widget>[
          Container(
            color: Color(0xFFdddeee),
            child:Center(child:Text("Page 1"))
          ),
          Container(
            color: Color(0xFFdddeee),
            child:Center(child:Text("Page 2"))
          ),
          Container(
            color: Color(0xFFdddeee),
            child:Center(child:Text("Page 3"))
          ),
          Container(
            color: Color(0xFFdddeee),
            child:Center(child:Text("Page 4"))
          ),
        ],
      ),
      bottomNavigationBar: BottomNavBar(
        curentIndex: index,
        backgroundColor: Theme.of(context).colorScheme.inversePrimary,
        onTap: (value) => setState(() {
          index = value;
          controller.animateToPage(
            index,
            duration: const Duration(milliseconds: 300),
            curve: Curves.ease,
          );
        }),
        children: [
          BottomNavBarItem(
            title: "Home",
            icon: Icons.home_outlined,
          ),
          BottomNavBarItem(
            title: "Search",
            icon: Icons.search_rounded,
          ),
          BottomNavBarItem(
            title: 'Chat',
            icon: Icons.chat_bubble_outline,
          ),
          BottomNavBarItem(
            title: "Profile",
            icon: Icons.person_outline,
          ),
        ],
      ),
    )
    );
  }
}

class BottomNavBarItem {
  final String title;
  final IconData icon;
  BottomNavBarItem({
    required this.title,
    required this.icon,
  });
}

class BottomNavBar extends StatefulWidget {
  final List<BottomNavBarItem> children;
  int curentIndex;
  final Color? backgroundColor;
  Function(int)? onTap;
  BottomNavBar(
      {super.key,
      required this.children,
      required this.curentIndex,
      this.backgroundColor,
      required this.onTap});

  @override
  State<BottomNavBar> createState() => _BottomNavBarState();
}

class _BottomNavBarState extends State<BottomNavBar> {
  @override
  Widget build(BuildContext context) {
  	return Container(
      decoration: BoxDecoration(
        borderRadius: BorderRadius.circular(16),
        color: widget.backgroundColor ?? Theme.of(context).colorScheme.primary,
      ),
      width: double.infinity,
      margin: const EdgeInsets.only(bottom: 10, left: 5, right: 5),
      height: 56,
      child: Row(
        mainAxisSize: MainAxisSize.min,
        mainAxisAlignment: MainAxisAlignment.spaceEvenly,
        children: List.generate(
          widget.children.length,
          (index) => NavBarItem(
            index: index,
            item: widget.children[index],
            selected: widget.curentIndex == index,
            onTap: () {
              setState(() {
                widget.curentIndex = index;
                widget.onTap!(widget.curentIndex);
              });
            },
          ),
        ),
      ),
    );
  }
}

class NavBarItem extends StatefulWidget {
  final BottomNavBarItem item;
  final int index;
  bool selected;
  final Function onTap;
  final Color? backgroundColor;
  NavBarItem({
    super.key,
    required this.item,
    this.selected = false,
    required this.onTap,
    this.backgroundColor,
    required this.index,
  });

  @override
  State<NavBarItem> createState() => _NavBarItemState();
}

class _NavBarItemState extends State<NavBarItem> {
  @override
  Widget build(BuildContext context) {
    return GestureDetector(
      onTap: () {
        widget.onTap();
      },
      child: AnimatedContainer(
        margin: const EdgeInsets.all(8),
        duration: const Duration(milliseconds: 300),
        constraints: BoxConstraints(minWidth: widget.selected ? 100 : 56),
        height: 56,
        decoration: BoxDecoration(
          color: widget.selected
              ? widget.backgroundColor ?? Colors.white
              : Colors.transparent,
          borderRadius: BorderRadius.circular(16),
        ),
        child: Row(
          mainAxisAlignment: MainAxisAlignment.center,
          children: [
            Icon(
              widget.item.icon,
              color: widget.selected ? Theme.of(context).colorScheme.inversePrimary : Colors.black,
            ),
            Offstage(
                offstage: !widget.selected, child: Text(widget.item.title)),
          ],
        ),
      ),
    );
  }
}
“اقرأ أيضاً: شرح استخدام FractionallySizedBox في فلاتر“
في هذا المقال، تعلمنا كيفية إنشاء شريط تنقل مخصص (Custom Navigation Bar) في Flutter. بدأنا بإنشاء كلاس BottomNavBarItem الذي يحدد كل عنصر في شريط التنقل. ثم قمنا ببناء كلاس BottomNavBar الذي يمتد من StatefulWidget ويتحكم في تصميم شريط التنقل بأكمله ومعالجة العناصر الفرعية والفهرس الحالي ولون الخلفية ودالة onTap. بعد ذلك، قمنا بتصميم شكل شريط التنقل باستخدام كلاس _BottomNavBarState، واستخدمنا كلاس NavBarItem لتحسين عناصر التنقل الفردية بتحديد الشكل والرسوم المتحركة والتفاعل. أخيرًا، جمعنا كل العناصر معًا لإنشاء شريط التنقل المخصص الكامل Custom Navigation Bar.
يمكنك الآن استخدام شريط التنقل المخصص Custom Navigation Bar في تطبيقات Flutter الخاصة بك وتكييفه وفقًا لتصميم ووظائف التطبيق الفريدة من نوعها.


